How to manage alerts for Active IQ Unified Manager
Applies to
- Active IQ Unified Manager 9.7 or later (AIQUM)
- Microsoft Windows Server
- VMware OVA
- Red Hat Enterprise Linux (RHEL)
- CentOS
Note: Active IQ Unified Manager 9.6 uses the old OnCommand Unified Manager web interface.
Description
- This Knowledge Article is intended to help guide storage administrators in managing alerts in Active IQ Unified Manager 9.6+.
- If you are looking to manage alerts in the older OnCommand Unified Manager see the following Knowledge Article.
- Alerts are configured to notify administrators of a new status change on clustered storage systems.
- When alerts are being received for a status that is already known, or expected, administrators have the opportunity to disable the associated alert.
- It might be necessary to disable the related alert, or exclude certain resources from alerts.
- If you don't see the event you need you can look into EMS subscription.
Procedure
Navigating to Alerts
1. Login to Active IQ Unified Manager.
2. Expand Storage Management.
3. Click Alert Setup.

Adding Alerts
- For instructions on adding an alert to Active IQ Unified Manager see our online documentation Configuring Unified Manager to send alert notifications.
- It is strongly suggested not to create 'catch all' alerts within Active IQ Unified Manager, as these kinds of alerts reduce the flexibility of alert management within the application.
- Catch all alerts include (but not limited to) all warning events for all clusters, all error events for all clusters.
- NOTE: Alert configurations do not apply to child objects. For example, if you add "all clusters" to the resources of an alert it does not automatically include the nodes, luns or other objects that are part of the cluster.
- Best practices for alert creation include creating an alert for a specific event type for a resource type.
- Examples:
- Event: Volume Space Nearly full. Resource: All volumes
- Event: Volume Space Nearly full. Resource: volume1
- Event: Port Status down. Resource: LIF-01, LIF-02
Disabling Alerts
1. Click the checkbox next to the alert that you want to disable.
2. Click Disable.

Deleting Alerts
1. Click the checkbox next to the alert that you want to delete.
2. Click Delete.
Testing Alerts
1. Click the checkbox next to the alert that you want to test.
2. Click Test.
Managing Exclusions
1. Click the checkbox next to the alert you want to edit.
2. Click Edit.
3. Click Resources in the left side menu.
4. By default the Resources tab opens to the Include tab.

Note: In the example screenshot provided, << All Volumes >> are the resources that have been identified for this alert. This means that one or two volumes cannot be singled out from the Include tab.
- Click the Exclude tab at the top of the window.
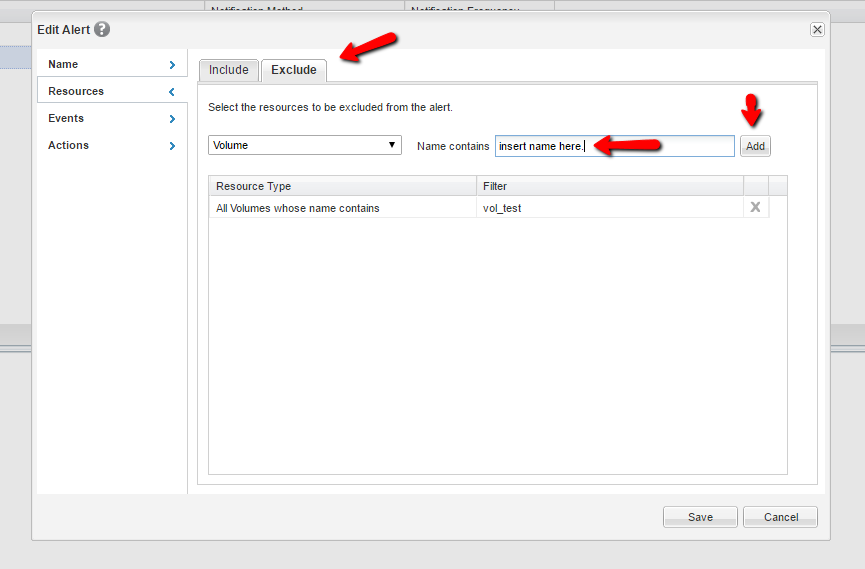
6. The resulting window will allow you to set exclusions for resources that contain a naming convention, such as, all volumes that are test volumes may contain the naming convention of vol_test.
- Alternatively, you can specify the exact volume name for more accuracy.
- If you have duplicate volume names across several clusters, but you do not want to disable alerting for all of those volumes, you will need to specify
cluster_name:/volume_namefor accuracy.
Configuring Actions
- Unified Manager can be configured to perform various actions upon being triggered. To configure alert actions, go to the Actions section of the Edit Alert modal.

- Select the actions that will take place when the alert is triggered
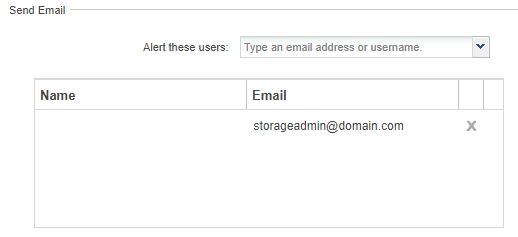
- Send email notification (with optional repeat reminder)
- Make sure the intended email recipients are added to the recipient table.
- Select the reminder frequency and period, or once if no reminder emails are needed.
Note: Repeating reminders only apply to email notifications. Repeat notifications will continue to notify until acknowledged.

- Make sure the intended email recipients are added to the recipient table.
- Issue SNMP trap
- To utilize this option the intended trap host's address must first be added to the Trap Destination Host field, located in General > Notifications.

- Check the Issue SNMP trap checkbox in the alert's Actions section to enable trap generation.

- Note that the trap host will need to have the Unified Manager MIB (specific to the UM version) to parse the trap information.
Where can I download the MIB files for Active IQ Unified Manager?
- To utilize this option the intended trap host's address must first be added to the Trap Destination Host field, located in General > Notifications.
- Execute a script
- To utilize this option, the intended script must be added to Unified Manager via the Storage Management > Scripts interface.

- After the script is added it will be selectable from the Actions tab within the Edit Alert modal.

- To utilize this option, the intended script must be added to Unified Manager via the Storage Management > Scripts interface.
- Send email notification (with optional repeat reminder)
NOTE: Alert configurations do not apply to child objects. For example, if you add "all clusters" to the resources of an alert it does not automatically include the nodes, luns or other objects that are part of the cluster.
Additional Information
ActiveIQ Unified Manager alert configuration and management Resolution Guide